Using a Hydrometer to Measure ABV: Beginner's Guide (2026)
How to use a hydrometer to take gravity readings, apply temperature corrections, and calculate ABV from homebrew measurements. No signup.
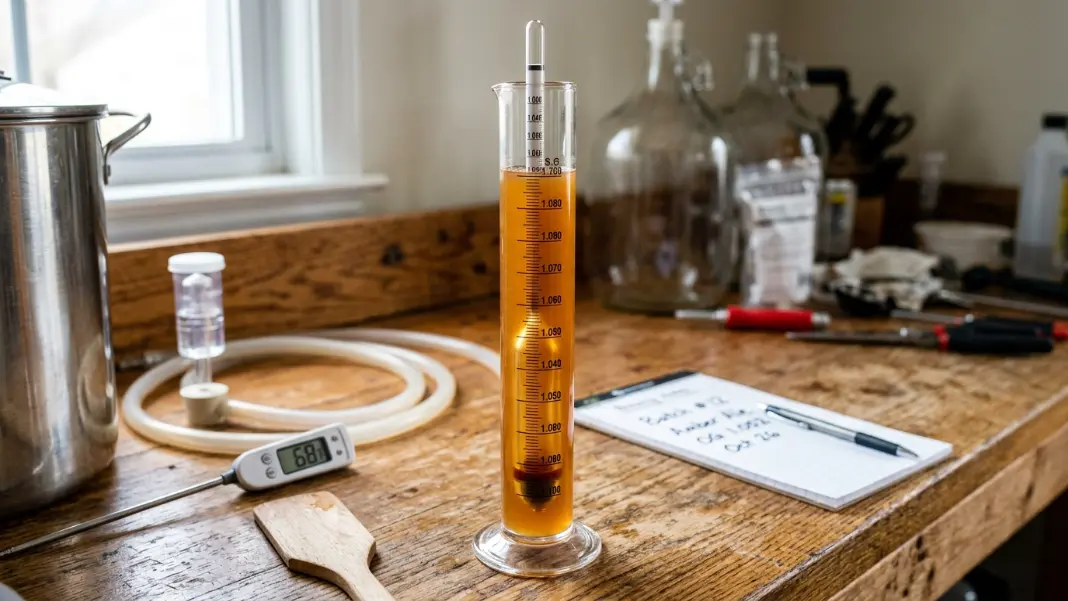
A hydrometer costs under $10, takes 30 seconds to use, and gives you the two numbers you need to calculate exactly how much alcohol your batch produced. Most new homebrewers either skip it entirely or use it without understanding what the reading means. This guide covers how to read a hydrometer correctly, when to take each measurement, and how to correct for temperature. Once you have your two readings, plug them into the ABV Calculator to get your percentage instantly.
What a Hydrometer Measures#
A hydrometer measures specific gravity: the density of a liquid relative to pure water. Water has a specific gravity of 1.000. Dissolve sugar into water and the reading goes up. A wort with an OG of 1.060 is 6% denser than pure water, and most of that extra density comes from dissolved fermentable sugars.
As yeast consumes those sugars and converts them to alcohol and CO2, the density drops. Alcohol is less dense than water, so a fermented liquid is closer to 1.000 than the original wort. The difference between the starting density (OG) and ending density (FG) is what the ABV formula uses to calculate alcohol content.
The three scales you will find on most homebrew hydrometers:
- Specific Gravity (SG): The primary scale. Ranges from about 0.990 to 1.170 on most homebrew instruments. This is what you use for ABV calculations.
- Potential Alcohol (PA): A pre-calculated ABV estimate printed on some hydrometers. Useful as a quick sanity check but less accurate than calculating from OG and FG separately.
- Brix: Used primarily by winemakers. Measures sugar content in degrees Brix rather than specific gravity units.
What You Need#
- Hydrometer (standard homebrew triple-scale, calibrated to 60°F / 15.6°C)
- Graduated plastic cylinder (250 ml or 500 ml)
- Sanitized thief or turkey baster for pulling samples
- Thermometer
- Notepad or phone to record readings
The cylinder matters. Dropping a hydrometer directly into a fermentation vessel is inaccurate because you cannot read the scale at eye level, the instrument floats at an angle, and you contaminate the batch. Always pull a sample into a clean, sanitized cylinder.
How to Read a Hydrometer#
Step 1: Pull a sample
Draw enough liquid to fill your test cylinder to within 2-3 inches of the top. The hydrometer needs to float freely without touching the sides or bottom.
Step 2: Lower the hydrometer in slowly
Drop it gently into the cylinder and give it a light spin. Spinning dislodges CO2 bubbles that cling to the instrument during active fermentation. Bubbles on the surface of the hydrometer push it up and make the reading artificially high.
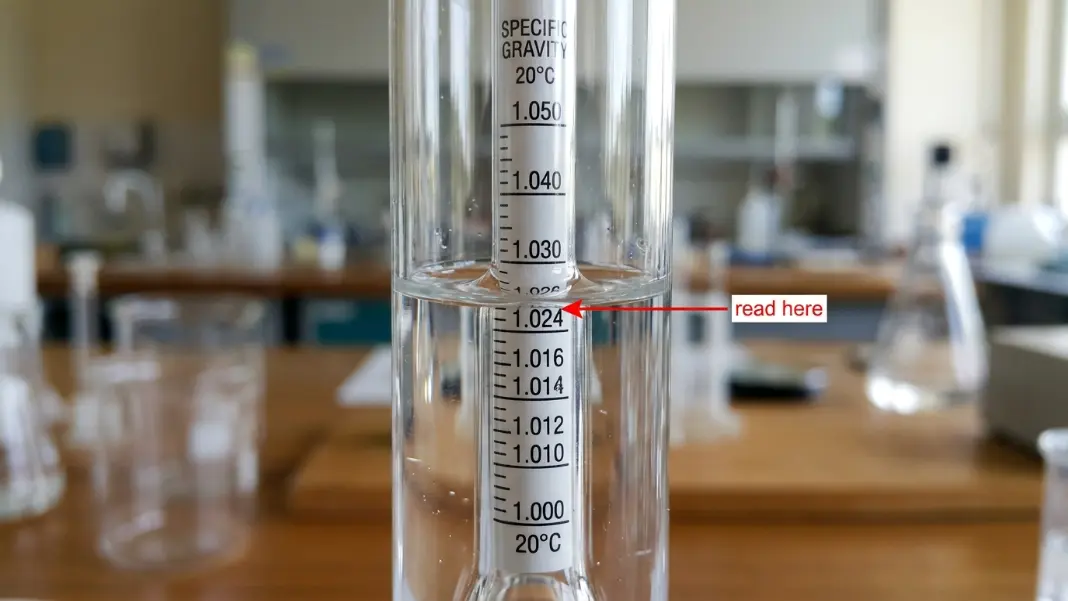
Step 3: Read at the bottom of the meniscus
The liquid will curve up around the hydrometer stem. This curve is called the meniscus. Read the scale at the bottom of the meniscus, not the top of the liquid surface. Reading at the top of the curve adds roughly 0.001-0.002 to your gravity reading.
Step 4: Read at eye level
Hold the cylinder at eye level or crouch down to see it straight on. Looking down at the hydrometer at an angle causes parallax error, which skews the reading. The difference between an angled reading and a level reading can be 0.002-0.004 SG.
Step 5: Record the reading immediately
Do not try to remember it. Write it down or type it into your phone before you do anything else.
Taking the Original Gravity Reading#
Original gravity is measured after the wort is fully chilled and ready for pitching, before yeast is added.
Timing: After chilling the wort to pitching temperature (usually 65-72°F for ales, 48-55°F for lagers). Do not measure OG from hot wort. Beyond the temperature correction issue, hot wort produces a reading from a different physical state than the final product.
Why OG matters: Your OG tells you whether your recipe hit its intended fermentable sugar target. A recipe designed for OG 1.055 that comes in at 1.042 has lower mash efficiency than expected. You either add fermentable sugar (dry malt extract, honey, table sugar) to hit the target, or you accept a lower-ABV outcome and adjust the recipe for next time.
Target OG ranges by category:
| Category | Typical OG Range |
|---|---|
| Session beer (under 4%) | 1.028 - 1.045 |
| Standard strength beer (4-6%) | 1.045 - 1.065 |
| Strong ale / IPA (6-8%) | 1.065 - 1.085 |
| High gravity (8-12%) | 1.085 - 1.110 |
| Extreme (12%+) | 1.110+ |
Record your OG and save it. You need it to calculate ABV and to assess whether fermentation ran to completion when you measure FG.
Taking the Final Gravity Reading#
Final gravity is measured after fermentation is complete, before packaging (kegging or bottling).
When to measure: Wait until visible fermentation activity slows significantly. For most ales this is 7-14 days. Then take a gravity reading. Take a second reading 48-72 hours later. If both readings match, fermentation is done. If the gravity is still dropping, wait and check again.
Never skip the second reading confirmation. Bottling or kegging a beer that has not finished fermenting is one of the most common causes of exploding bottles. Residual fermentable sugar will continue producing CO2 in the sealed container.
What a normal FG looks like:
Most ale yeasts finish between 1.008 and 1.016. Lager yeasts typically finish slightly lower, between 1.006 and 1.012. High-attenuation Belgian strains can push below 1.006. Mead and wine often finish at or below 1.000.
If your FG is significantly higher than your target, check these causes before concluding fermentation is stuck:
- Temperature dropped below the yeast's recommended range, slowing activity
- Yeast was under-pitched, leading to incomplete fermentation
- Mash temperature was too high, producing fewer fermentable sugars and more dextrins (this raises FG but is not stuck fermentation)
- A high-adjunct or high-wheat recipe can have naturally higher FG due to non-fermentable components
Temperature Correction#
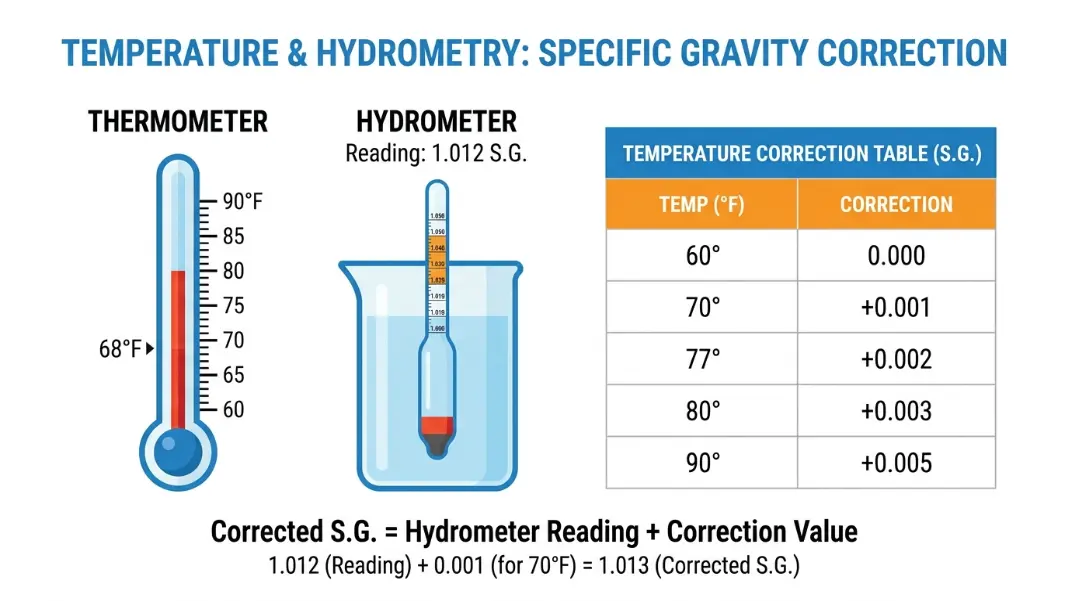
Most homebrew hydrometers are calibrated at 60°F (15.6°C). Taking a reading at a higher or lower temperature requires a correction, otherwise the gravity reading will be off.
Why temperature matters: Liquids expand when warm, which lowers density and makes the hydrometer float lower, reading an artificially low gravity. Cold liquids contract, raising apparent density and making the hydrometer read high.
Temperature correction table:
| Sample Temperature | Correction to Add |
|---|---|
| 50°F (10°C) | -0.001 |
| 60°F (15.6°C) | 0.000 (no correction needed) |
| 70°F (21°C) | +0.001 |
| 77°F (25°C) | +0.002 |
| 86°F (30°C) | +0.003 |
| 95°F (35°C) | +0.005 |
| 104°F (40°C) | +0.007 |
Example:
You take an OG reading of 1.058 at 77°F. Corrected OG = 1.058 + 0.002 = 1.060.
For precise correction, use the formula:
SG_corrected = SG_measured × ((1.00130346 - 0.000134722124 × T + 0.00000204052596 × T² - 0.00000000232820948 × T³) / (1.00130346 - 0.000134722124 × 60 + 0.00000204052596 × 60² - 0.00000000232820948 × 60³))
Where T is temperature in Fahrenheit. In practice, the table values are accurate enough for all homebrew purposes.
Calculating ABV from Your Hydrometer Readings#
Once you have a corrected OG and confirmed FG, the calculation is:
ABV = (OG - FG) × 131.25
Full example:
- OG reading at 77°F: 1.056 → corrected to 1.058
- FG reading at 68°F: 1.012 → corrected to 1.013
- ABV = (1.058 - 1.013) × 131.25 = 0.045 × 131.25 = 5.9%
Enter these corrected values into the ABV Calculator to confirm and see your apparent attenuation alongside the ABV figure.
For a deeper explanation of the formula itself, including the alternate version for high-gravity batches above 8% ABV, see How to Calculate ABV for Homebrewers.
Common Hydrometer Mistakes and How to Avoid Them#
Not sanitizing the sample thief or cylinder. Any contamination in your sample can introduce wild yeast or bacteria. This does not affect the current reading but if you return the sample to the fermenter (some homebrewers do to preserve volume), you risk infecting the batch. Pull a sample from the tap or thief into a sanitized vessel and discard it after reading.
Reading during active fermentation. CO2 bubbles clinging to the hydrometer stem push it up and produce a falsely low gravity reading. Spin the hydrometer to dislodge bubbles or let the sample degas for a few minutes in the cylinder before reading.
Skipping temperature correction on hot post-boil samples. Some homebrewers take a pre-chill OG reading directly from the kettle. At 160°F, the correction is so large (+0.020 or more) that the reading is essentially useless without correction. Chill to near-pitching temperature first.
Letting the hydrometer touch the cylinder wall. If the hydrometer rests against the glass, surface tension holds it at an angle and the reading is off. Make sure it floats freely and vertical in the center of the cylinder.
Fill a sanitized test cylinder with a wort or beer sample. Lower the hydrometer gently, spin it to dislodge bubbles, and read the specific gravity at the bottom of the meniscus at eye level. Record this as OG before fermentation and FG after fermentation is complete. Apply a temperature correction if the sample is not at 60°F. Then calculate ABV using (OG - FG) × 131.25, or use the ABV Calculator for an instant result.
Ideally at 60°F (15.6°C), which is the calibration temperature for most homebrew hydrometers and requires no correction. If that is not practical, measure the temperature and apply a correction. At 70°F, add 0.001 to the reading. At 77°F, add 0.002. At 86°F, add 0.003. Avoid taking readings above 95°F as the correction becomes larger and less reliable.
A reading below 1.000 means the liquid is less dense than pure water, which happens when significant alcohol is present. Dry wines, meads, and sometimes very dry beers finish below 1.000 because ethanol (density 0.789 g/ml) is less dense than water. This is normal and expected in fully fermented dry beverages. Use the actual reading, including values below 1.000, in the ABV formula.
Enough to fill a 250 ml or 500 ml test cylinder to within 2-3 inches of the top, so the hydrometer floats freely without touching the bottom. This is typically 200-400 ml depending on cylinder size. The sample is usually discarded rather than returned to the fermenter to avoid contamination risk.
A refractometer works well for measuring OG in unfermented wort, requiring only a few drops of liquid. However, once alcohol is present, the refractive index of the liquid changes in a way that makes raw refractometer FG readings inaccurate. You must apply a correction formula (Terrill correction) to convert refractometer FG readings to actual specific gravity before using them in the ABV calculation. For simplicity, most homebrewers use a hydrometer for FG measurements and keep the refractometer for quick OG checks during the brew day.
Test it with distilled water at 60°F. It should read exactly 1.000. If it reads 0.998 or 1.002, your instrument has a calibration offset. Record that offset and add or subtract it from all future readings. Most inexpensive homebrew hydrometers have small offsets of 0.001 to 0.003, which is acceptable for homebrew purposes as long as you apply the same correction consistently to both OG and FG readings.
Written by
Hassaan Rasheed
Web Developer & Content Researcher
Hassaan builds calculators and writes source-linked guides across the site's subject areas. Calculator methods and reference data are documented in each guide so readers can verify the underlying sources.
About the author and methods